Showing posts with label Projects. Show all posts

Monday, May 15, 2023

My New Garden Project


Greetings! I'd like to share with you my new garden project, which I've been thinking about doing for some time now. (I apologize for the long post.)

I've noticed for some years now that I enjoy the gardens that are closer to my house much more than those areas that are farther away or located in places where I rarely see them. This makes sense, of course, and not just because I'm able to enjoy them more often because they're closer. Also, I remember to maintain them, which is much easier when they're right outside my door, and so they are more successful garden areas -- which are much easier to enjoy than garden failures.... :-)

So, I've been thinking that I might get rid of one or two of my more distant areas, and make better use of a spot in front of my house.


Here's my front yard last summer. My Paradise Garden is to the right, just out of the photo, and there were two rectangles of grass at the foot of my front steps.

And here's the Paradise Garden last July, with the center grass section at forefront. This garden area is pretty easy to maintain.

My Paradise Garden right next to my house is so much easier to maintain than other areas, both because it is close to my house (I can pad out in bare feet and casually pull a few weeds), and because the garden beds are surrounded by paving stones, so nasty runner grass isn't always invading the beds like it does in beds in other parts of my property.

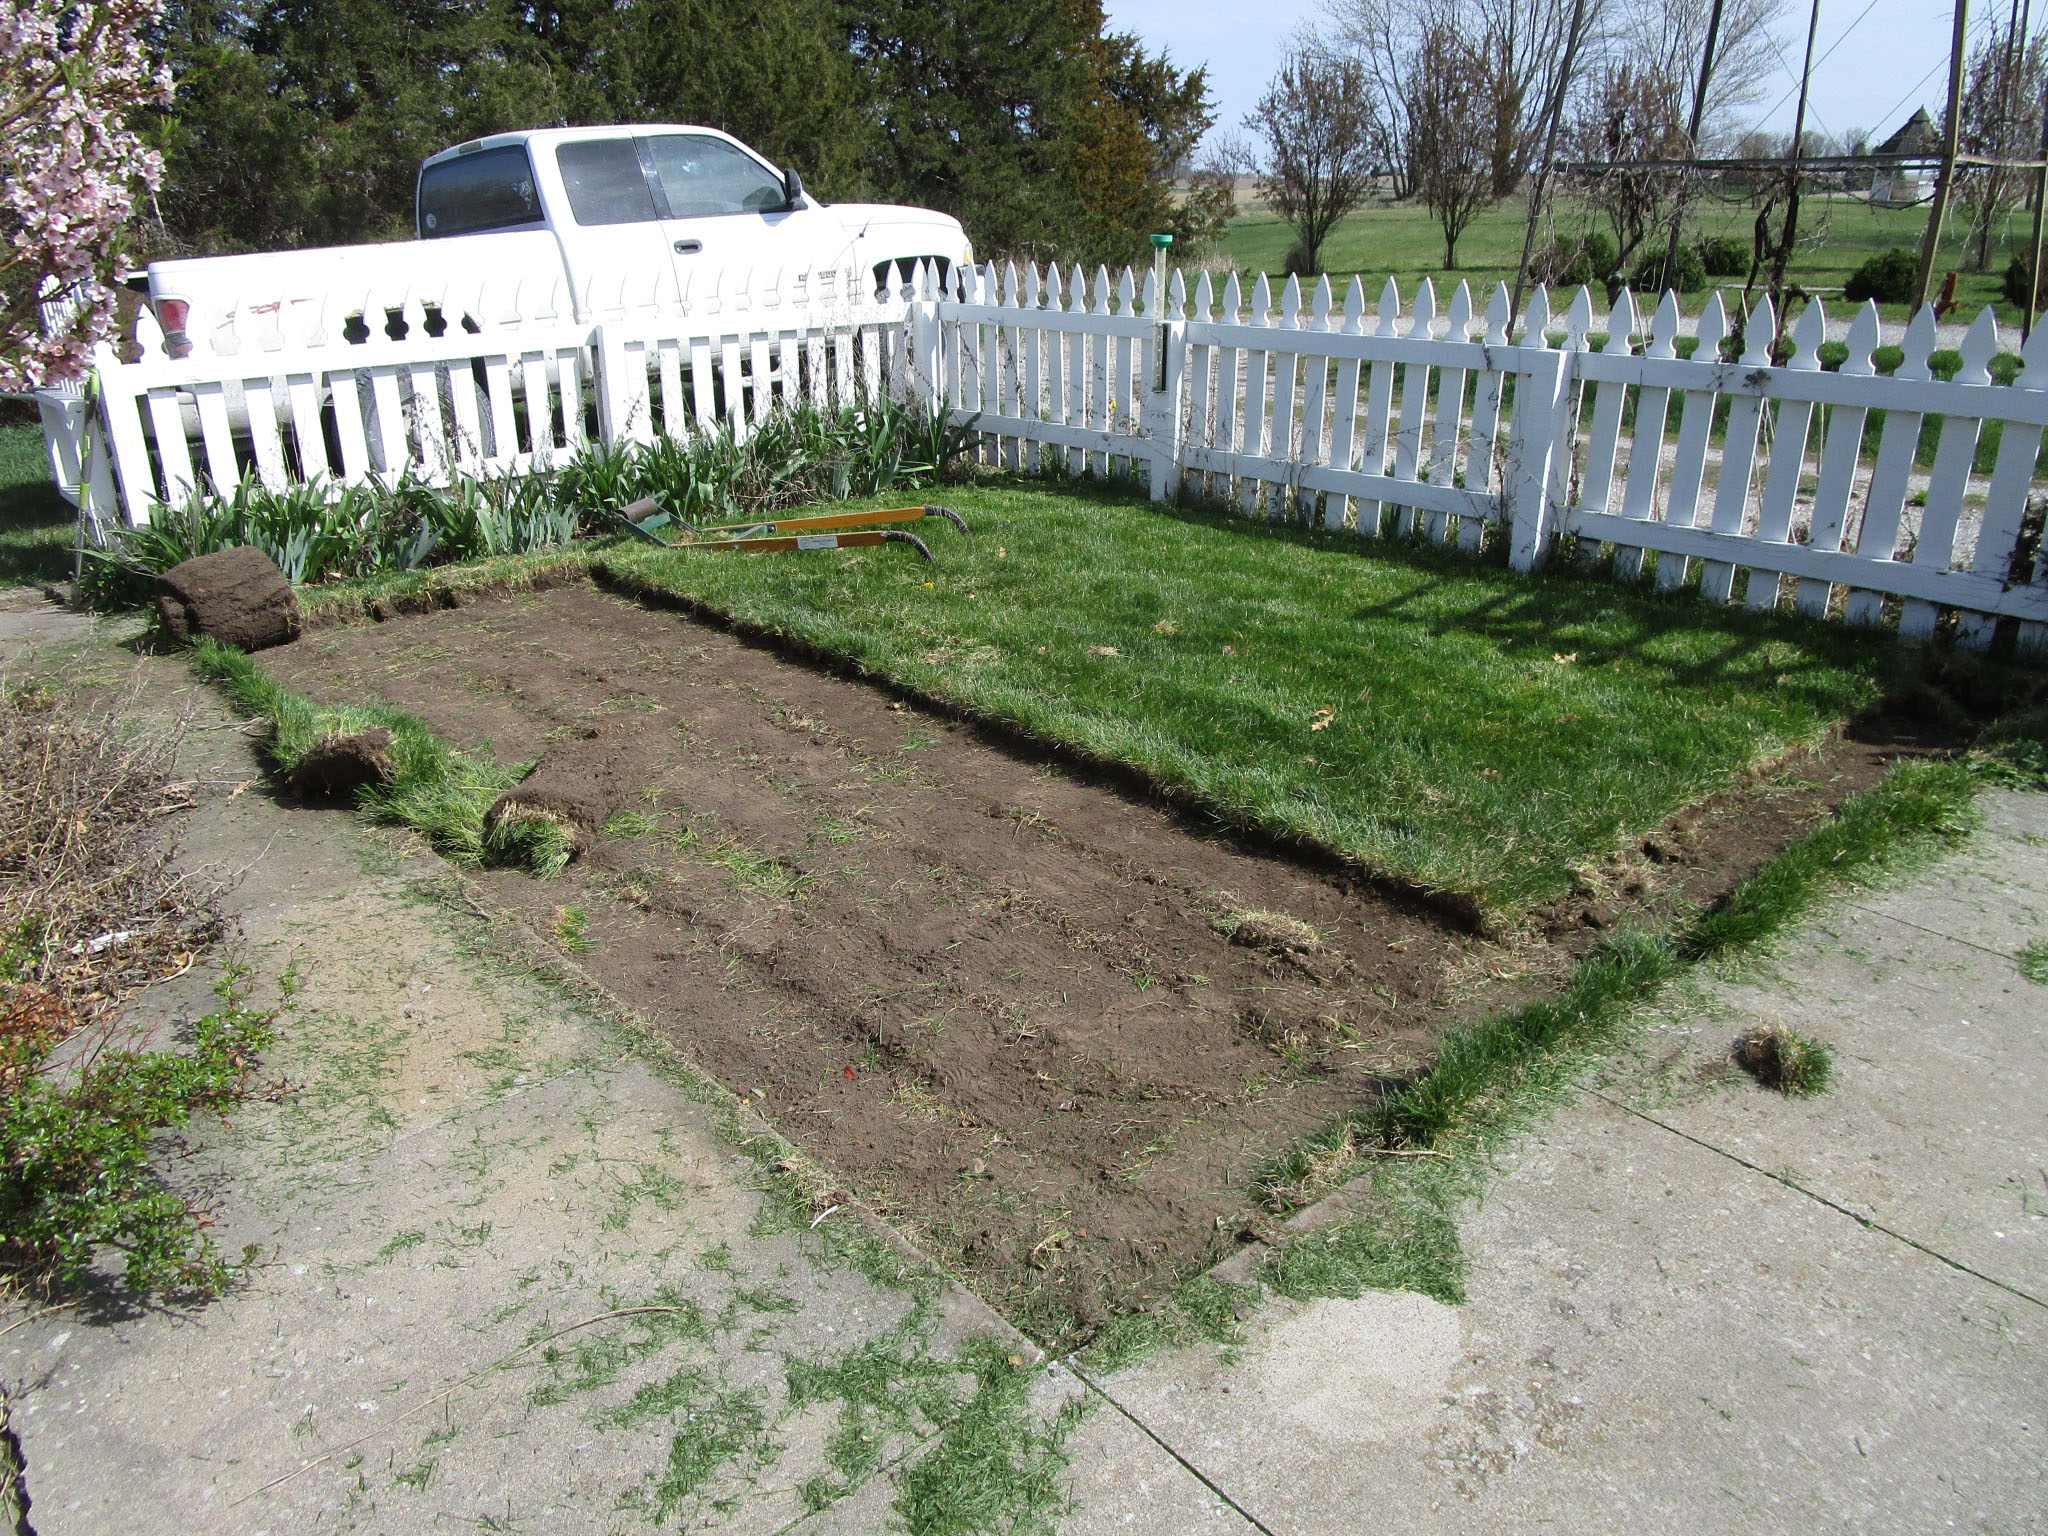
So in late April, I paid my teenage son to use a sod-remover (a manual one that you kick with your foot, which he was able to get the hang of using) to remove the grass in the corner section of my fenced yard (see first photo).


Then, I used a shovel to excavate several inches down, where garden paths would be laid...


...ordered a bunch of pavers, gravel and sand to be delivered, and paid my handy son to help lay the paths. I then began to dig over the planting areas to loosen the soil that had been below the sod.


I'll plant the two triangular beds with annuals this year (probably this week), in case there's still some runner grass in the soil that needs to be eradicated. (I tried to pick out as many roots as possible when digging over the beds--that's what the bucket was for--but I probably missed some.)

I'm hoping these beds will be much easier to maintain than some of my other garden areas. I haven't yet decided what to call this new garden: the Corner Garden? the Diagonal Garden? the Triangle Garden? Hmmm... what do you think?

But I must eliminate some more difficult garden areas in exchange for this new one--that's my rule: any new garden must be offset by eliminating two old garden areas (or a much larger one).

So, I'm afraid I will be getting rid of a garden that hasn't been working so well for the past year or so: the Rainbow Border.

I made the Rainbow Border back in 2012. At first, I tried to plant it in sections with flowers in the order of the colors of the rainbow: ROYGBIV.


Here's a long-distance view of the Rainbow Border back in 2014. The Orienpet lilies made a pretty good show in July, preceded by early June perennials and followed by zinnias and other annual flowers.

After a while, the Orienpet lilies I planted declined and mostly disappeared--I think it's possible that the red cedar windbreak behind the border interfered with their ability to grow in that spot. Some perennials seemed to do better, so I let go of the ROYGBIV plan and mixed up the colors, but still tried to stick with brightly colored flowers in all colors of the rainbow.

This looked pretty good for a few years. Here it was in 2019 and 2021:


Very colorful in late May/early June....


This was a respectable perennial border, even in June of 2021.

But there were some problems with the Rainbow Border: first, it was infested with grass that was impossible to dig out. I sprayed that grass with Ortho Grass-B-Gone, which did help, but I don't think it took care of the problem entirely. And the red cedar windbreak behind it was probably not so good for the plants.

And the border looked OK around June 1st, but looked ratty later in summer, because the annual flowers I planted there never seemed to grow very well.
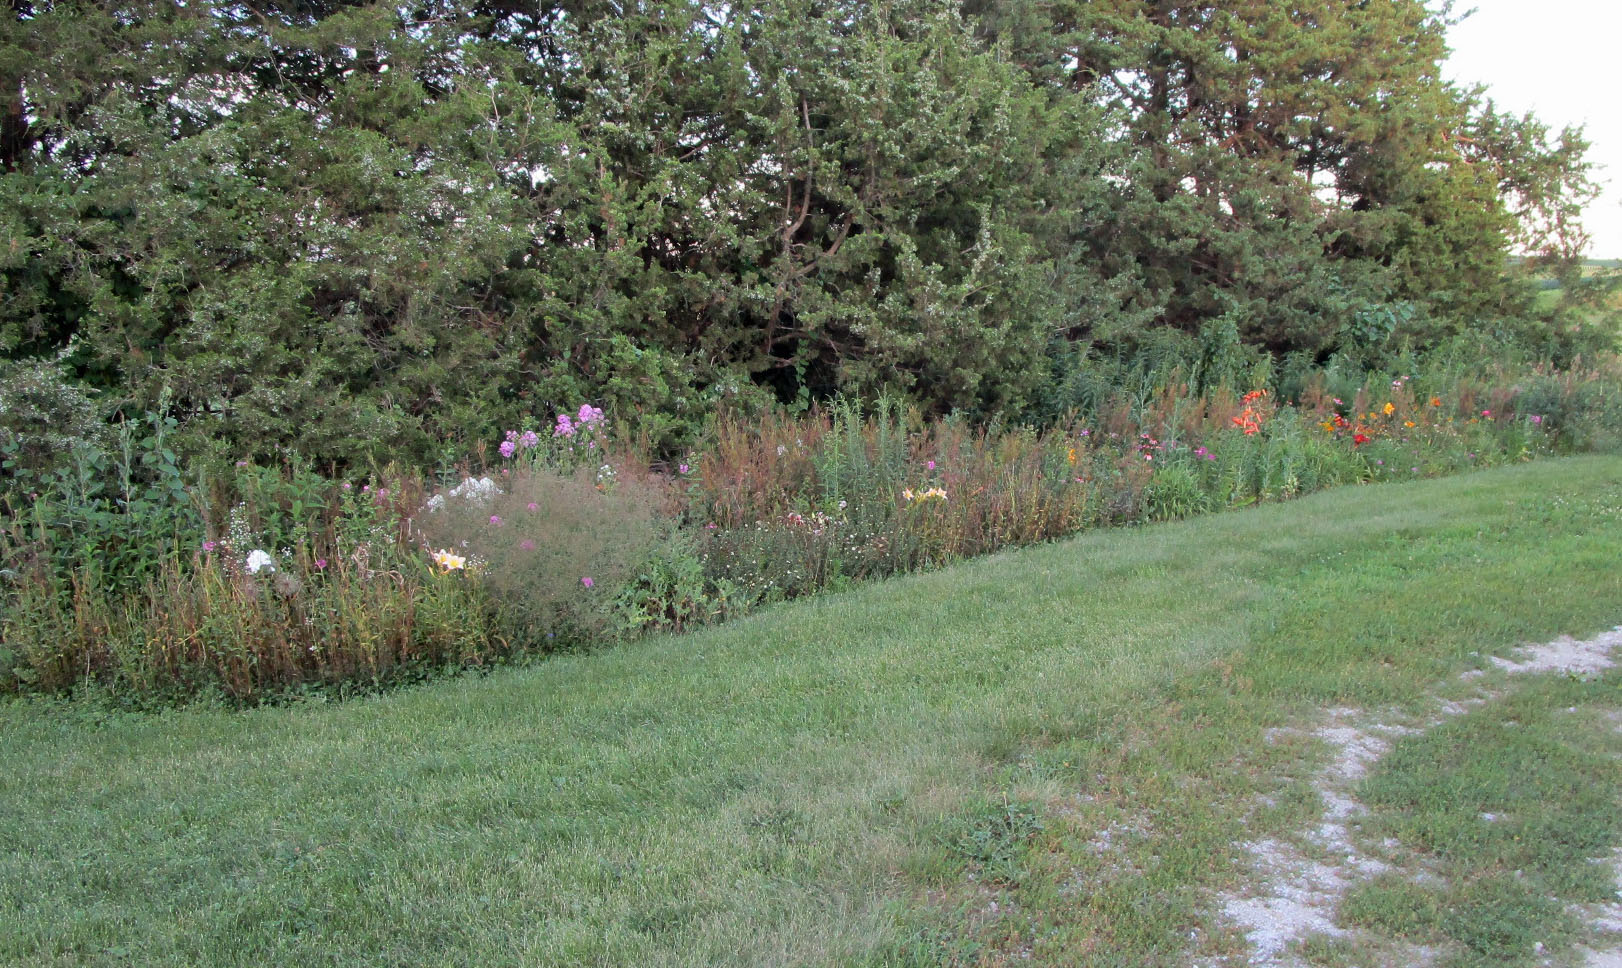

In mid-July 2022, the border just looked ratty, weedy and blah. Maybe that was just a bad year, but this made me wonder why I still have this border.


The Rainbow Border is a fair amount of work to maintain--which, when it looked good, didn't bother me so much. But hard work and bad results is tremendously discouraging. 

So, I've made the decision to eliminate the Rainbow Border, and move the best of the remaining plants to other areas in my gardens that need additional plants:


This border in front of my house, shown in 2020 after I fixed the edging, still doesn't have enough planted in it. I removed the two large clumps of yarrow/Achillea and moved them to my Yellow Garden, and this fall or next March, I will move many of the Rainbow Border May/June perennials here.

My Yellow Garden behind my house could use some of the yellow flowering perennials from the Rainbow Border.

And my Front Border in front of the white picket fence might look nice with a few of the Rainbow Border plants.

Anyway, that's what I've been working on, thinking about and making decisions about this spring. I'll show the results of my changes over the next year as they occur.

I hope your own gardens are easy and enjoyable to maintain, and thanks for reading about my efforts to make mine easier. -Beth


Monday, May 31, 2021

Boxwood Butchery


Greetings! Readers of my blog have probably noticed that I have many, many boxwood shrubs -- several hundred -- in my various garden areas. The most prominent boxwood planting is my Herb Garden, shown above in a photo taken three years ago. (This is one of my favorite pictures of my garden, because it shows my white picket fence, the formal Herb Garden, and the Iowa farm scenery beyond -- I feel the photo really captures the feeling of my gardens and their setting.)

The Herb Garden was the first garden area I made when we moved out here in 2008. I had wanted to make a formal garden area for years and had been planning the type of general layout I wanted even before we moved here. We had some grading work done in other parts of our property, to make the retaining wall for our garage and to smooth some lawn areas, so I had the guy with the bulldozer level up this area a bit too when he was out here.

Here's a photo of our house and property taken in fall 2007, before we bought the place. Our garage now stands where the trees at left stood, our driveway area is much larger, and we tore down the small leaning shed. And to the right of the house, the ground sloped down away from the house -- I had that area leveled up so I could make my formal Herb Garden there.


Here's the freshly laid-out Herb Garden, the following summer in 2008. The area is quite a bit more level than it was in the last photo, and I outlined gravel paths with about 200 'Green Velvet' boxwood seedlings that I bought from a nursery in Alabama.


The Problem

But there was a big problem with my boxwood hedges in my Herb Garden: I planted the boxwood seedlings too close together. Each of the beds is 4.75 feet wide and 11 feet long, and I planted the boxwoods less than a foot-and-a-half apart, not realizing that the tiny seedlings had a mature size of three feet wide.

This didn't get to be a problem for some time, because boxwood takes years to grow to mature size. 

Here's a picture from 2014: Six years after planting, the boxwoods were finally growing together nicely, and I was able to trim them into continuous hedges.


By 2018, the boxwood hedges had gotten quite a bit larger (you can see how much taller the hedges were compared to the solar lights at the entrance, from the previous photo). I needed to remove a lot of the growth each year, in order for there to be room in the beds for herbs to receive any light.


The boxwoods continued to grow. I trimmed them every year, but found myself needing to trim more off of them each time, so that there was room to grow herbs in the beds. The design still looked good, though.

But spring of 2019 was exceptionally wet. The previous autumn (Fall 2018) was unusually wet, plus a lot of snow melted off in winter, and then it just wouldn't stop raining in spring 2019. Our basement actually flooded with an inch or two of water that spring (our house is on the top of a hill and our basement is tiled for drainage, so this was very unusual).

I waited until July of that year when things were finally dry to trim the boxwoods -- it's a bad idea to cut them when they're wet, because it makes them more susceptible to diseases. But apparently that precaution wasn't enough to prevent a problem.


This photo, taken in May 2020, shows that there is a problem.


I didn't notice the problem until nearly a year later, last May -- although I had vaguely noted that the boxwoods hadn't grown as much during 2019 as they usually do. Looking back at photos from Fall 2019, it's obvious now that they weren't growing well.

But by May 2020, the problem was all too visible: there were dead branches and whole dead areas on many of the boxwood shrubs.

Boxwood Blight?

For years now, I have been terrified that the dreaded Boxwood Blight will infest my gardens like it has in England and, to a lesser degree, in the eastern and southern US. There is no effective treatment for it, and it would necessitate the removal of my hundreds of boxwoods -- including this entire Herb Garden area. (When we returned from our trip to England in 2019, I scrubbed the bottoms of our shoes with disinfectant before getting on the return plane. Don't laugh: we visited a garden the day before our flight home in which the boxwoods looked horribly diseased.)

When I saw this damage, my heart nearly stopped. I immediately contacted our state Extension's Plant & Insect Diagnostic Clinic last May, but they were closed for lab work due to the coronavirus -- although people were answering emails.

So I did some more research online myself, and I realized from the symptoms that it's likely not Boxwood Blight (a fungal disease caused by Calonectria pseudonaviculata), which causes the boxwood leaves to fall off the plant.

Instead, it's likely Volutella blight (caused by the fungus Volutella buxi / Pseudonectria buxi), in which the leaves die but remain on the plant. The Extension person who emailed me agreed from the photos I sent that this was likely the case (although she wasn't able to do a lab confirmation).

Here's what the inside of that hedge with the dead streak looks like: interior dieback, but with the dead leaves retained on the plant.

Plus, I closely looked at some leaf samples, and they matched the descriptions of the symptoms described in the linked article from the Tennessee State Extension:

There are some "black streaks on petioles" (where the leaves attach to the stems), but not streaking
all the way up the stems, like in Boxwood Blight.


And here are the "salmon pink colored fruiting bodies (sporodochia)" mentioned in the article.


So the (very) good news is that my Herb Garden boxwoods are not the first documented case of Boxwood Blight in the state of Iowa. (Although it's still probably only a matter of time until it arrives, as it's been found in Illinois and Missouri, our neighboring states -- but not today.)


The outlook seems pretty grim, as many of the states around Iowa already have spotted boxwood blight there. Only a matter of time....


But the bad news is that I still have a blight problem, albeit one that that I might, with time, be able to mitigate and, with luck, be able to save my boxwood shrubs.

Boxwood Butchery

Two weeks ago I (and my 15-year-old son) began my radical project: to remove every other boxwood shrub in my Herb Garden and trim out the dead branches, opening up the remaining parts of the shrubs to more air circulation. With time, the remaining boxwoods might fill in and make a (looser) hedge again. I'll also treat the boxwoods with a copper-based fungicide over the next few years.

Here are a few photos, to revel in the carnage:

Like a crenellated castle wall.


Butchered.


After sawing off every other shrub, Step 2 is to cut out the interior dead branches and knock out all of the dead, diseased leaves trapped inside each shrub. This is pretty time-consuming, and I had to stop when it started raining two weeks ago -- but as soon as things dry out I'll resume this work.


And the lower limbs of each shrub that were lying along the ground need to be trimmed off, so air will be able to circulate under the shrubs. And note all those dead, diseased leaves from years of trimmings littering the ground. Those were hidden by the lowest limbs before.


There are literally heaps of boxwood leaves on the gravel paths. The leaves are so tiny it's difficult to rake them up effectively. But years of leaf detritus -- especially the diseased leaves covered in spores -- must be removed and burned, or disposed of in the garbage.


This arrived today. I should have bought one of these years ago to suck up the leaves after trimming the boxwoods -- I trim them every May or June. This kind of leaf hygiene might have helped prevent the blight in the first place, and I'm planning to use it from now on each year to keep the paths and the interior of the shrubs tidy.


Here's a view from an upstairs window, showing the butchery in all its gruesomeness. My Herb Garden hedges are going to look like a mouth with every other tooth missing for probably the next three to five years. Oh well. 


I had planned to open my gardens this year, but it might be a few more years until I do that now. But I really do hope that eventually the boxwoods will look good again -- and be healthier too. I'm a patient gardener and the years will pass before I know it. With some luck, this, my first garden area, will eventually be rejuvenated.

I hope your own gardens are beautifully blight-free, and that you are enjoying warm spring days outdoors. And thanks for reading this long and somewhat cheerless (but still hope-filled) post. Best Regards, -Beth


Sunday, April 5, 2020

April Sunshine

Look at that golden foliage gleaming in the sunshine!

Greetings! Finally... some wonderfully warm, sunny days to enjoy outside. :-) It makes everything seem happier. I've been able to do a few things outside during the past week, and some days I've just been able to sit outside in the sunshine and soak it in. In these days of stressful news and economic shutdown, this makes everything seem... much better.

I realize that while sunshine makes people feel good, it results in photographs that aren't so good -- but that's what we have, so I apologize if the pictures in this post are a bit glare-y.

First, a few things I've gotten done:

BEFORE: My Rainbow Border a month ago still needed to be cut back and raked out.

AFTER: Cut back and raked out (with the massive amount of brush hauled off by wheelbarrow by my teenage son, who's really becoming useful around here...), the border is ready to soak up the sunshine. I still need to dig out some winter weeds, but clearing out the brush will hasten the emerging perennials, now that we've had some sunny days to warm the soil.

BEFORE: My East Patio garden area a month ago

AFTER: The same area after I dug out and moved several shrubs. A mock orange, a reblooming lilac (next to the two back posts in the previous photo) and a peony were no longer blooming much because the new pergola blocks too much of the sun for them. I have plans to make a tropical garden around this area, with tropical annuals and potted houseplants that I'll put here in May, so I needed to make room for the new plants. The shrubs have been moved to sunnier areas, where they'll be happier.

Greenhouse Woes:

And I have some sadly disappointing news: I finally decided that the greenhouse I got several years ago was just too utterly useless to go on as the eyesore it was. I had such high hopes for it when I ordered it and put it together back in 2017:


Here it was in all its hope-filled glory back in summer 2017.
I was so looking forward to using it the next spring.

Here it was only two months later, after a few windy days, with nearly every polycarbon panel blown out. The whole blasted thing probably would have blown away if I hadn't gotten our handyman to make a sturdy wooden base attached to our garage. And that wasn't even an unusually windy day. This happened repeatedly. I got seriously tired of looking for panels in the fields around our house. Grrr.
In the intervening two years, I tried everything to keep the panels in: extra clips (utterly useless); running packing tape around all sides; wrapping the whole thing in clear plastic and taping it in multiple places; riveting wood strips to the metal frame supports to physically hold the panels in place (which did work to some extent). But the panels themselves turned yellow in our intense sunshine, particularly on the ceiling, the sunniest exposure, and some of them broke in pieces last year. 

My husband and son finally undertook the sad work of putting it out of our misery.

Going...

...going....
Gone.

I guess I didn't actually need a greenhouse, like most American gardeners don't need them -- they're quite rare here, even among serious gardeners. I was swayed into thinking I needed one by the British gardening culture, which makes extensive use of them to start seeds and grow things like tomatoes, which which England doesn't have enough sun and heat to grow outside.

But our climate makes them both utterly impractical (way too cold to heat in winter, way too hot to use in summer), and largely unnecessary (we can grow tomatoes outside here). As far as seed starting, a light fixture inside an already-heated house is far more practical and much cheaper too.

This florescent light fixture (on a timer) and heat mat in my sunroom work so much better to start seeds!

I suppose if I had masses of obscure seeds to start every year, I would need more than this, but many of the annuals I plant each year are those I just buy as starts at local greenhouses, which do a much better job of growing them on than I'd be able to. For unusual plants, I can start those myself here.

But it's still a disappointment that my greenhouse effort was such a dismal failure. Sigh....


But on a happier note, here's a few pictures of bulbs blooming in sunshine:

It sure is good to see these little guys about this time!

These hyacinths smell so good with the sunshine warming them, perfuming the whole area.
These white hyacinths in my Paradise Garden gleamed almost intolerably brightly in the sun, and were covered by bees.
These squill are always such a welcome sight.
This pussy willow (Salix) next to our LP tank is absolutely covered with bees in the sunshine -- it sounded like the inside of a hive when I walked past it this afternoon. Busy, busy....


Anyway, I hope you have been able to enjoy some sunny days in your own gardens this spring. It's more important than ever that we're able to get outside and enjoy our gardens in these stay-at-home times. I realize that I'm very lucky to be able to live out in the country amid such beautiful scenes -- and no problem social distancing here!

Hope you and your families are well, and that everything is soon back to normal, in whatever way we each need "normal" to be. Thanks for reading! -Beth